Monday, February 16, 2015

Why I havent been stamping


Well. This is my why. I am FINALLY, after 10 long years, redoing my ugly kitchen. The days of staring at my lovely almond and green faux tile paneling has come to an end bringing visions of  "farmhouse chic" in its place.  We're traveling down a long, and often dark, path with this renovation.  $$ won the battle so this is a true DIY adventure. I'm kinda handy with some tools so I figure, why not? We're not doing anything major like moving gas lines or rewiring circuits. It's just a really time consuming face lift :)

In actuality, it hasn't really taken me all that long to get where we are today.  Ok, it's taken about 6 weeks BUT I'm really only working on it during the weekends because my day job schedule has been kind of crazy. We've had some random setbacks (like who installs cabinets on the subfloor? Really??) And then there's my fear of large power tools so I've done all my cutting and trimming to date with hand tools. Thank heaven for my Dremel or I'd still be trimming out the bead board.  That said, the novelty of washing dishes in the bathroom and eating out most nights is quickly starting to lose its charm.  So I'm kicking it into high gear. This girl wants her kitchen back...well, the new kitchen. Not the old, ugly one!

My stamp room, while currently free of stampers, has gotten quite the workout.  My class tables have made a great work surface to paint my ceiling tiles.  I really want a faux tin look ceiling without the faux tin ceiling price.  I found some pretty nifty 12x12 fiberboard tiles that have the pattern I was searching for and I'm using a combination of gray and silver paints to create just the right amount of patina.  People talk about having an accent wall.  I'm going to have an accent ceiling!
I've been taking before, during and after shots so I can create the "kitchen book" when I'm done. I can't imagine not scrapbooking this adventure once it's over. If you've been looking for crafty things from me but haven't seen them lately, this is why. It's crafty, just in a different way.  Now I'm off to go finish paining some ceiling tiles so we can get one step closer to getting my cabinets in!!

Thursday, January 29, 2015

Lotus Blossom meets my brayer


If you've been on Pinterest at all in the Stampin' Up! world over the last month, you've seen the Lotus Blossom EVERYWHERE! Talk about a popular stamp set. It's beautiful. There are so many great ways to combine color and texture. I've seen really beautiful cards made from this set.

I wanted to get my inspiration for this card somewhere other than good ol Pinterest. Sometimes I feel like there isn't an original idea in my own head when I spend hour after hour cruising that beautiful idea site. Instead, I turned to Google. I googled "lotus blossom" and clicked on Images. I think the best Inspiration truly does come from nature. First thing I noticed, lotus blossoms float. I need water. Second thing I noticed, lots of pinks and purple. Bring on Wisteria Wonder! Since I've got a Brayer Basics class on the horizon I might have found just the right bit of inspiration for this project.

I will be using this card as one of my class projects. It is a fun way to show how to blend similar colors to create a lovely graded background and highlights. It also incorporates a couple fun techniques that I think make this card stand out. Learning how to use your brayer makes this a relatively quick card for as detailed as it looks, too. I made a dozen of these as a swap with my stamp club in under 3 hours. What is that, 15 minutes a card? Not bad :-)

Visit my Meetup group at www.meetup.com/kellistamps4u and register for Brayer Basics. You will learn how to make this card and others using that magic rubber roller that takes your card making to a whole new level. Want your own Lotus Blossom stamp set? Make a $50 purchase during Sale-A-Bration and choose it as your free stamp set. That's the only way to get it. When SAB is over, it's got forever!

Tuesday, January 20, 2015

Gluten Free Almond Meal Pizza Crust with Turkey and Spinach Topping


We're constantly looking for new, exciting and tasty ways to explore healthy food in my house.  Myself, I have a gluten sensitivity (which I tend to ignore) that makes me feel kind of icky. We also have heart disease in my household so low fat, low sodium dishes are a must for us.  Low sodium, low fat, no gluten...no flavor, right?? Definitely not the case in my kitchen most of the time.  I love to try new recipes but even more so, I like to throw some stuff together and hope for the best when it's time to eat it.  That's kind of where we went with tonight's meal and I couldn't be more pleased with the results! We had "pizza" tonight that was low fat, low sodium, gluten free and totally delicious. What I loved the most was the crust has four main ingredients and combined in a bowl, no mixer required.

Gluten Free Almond Meal Crust (makes 1 crust)
2 cups almond meal/flour
2 tbsp coconut flour
2 tsp olive oil
2 egg substitutes (mine was 1/2 cup)

Preheat oven to 375 with a pizza stone in the oven to preheat as well.  Mix all ingredients together in a bowl with a spatula. It will come together quickly and should be moist and slightly sticky.  Place the ball between two pieces of parchment paper and roll out to 1/4" thickness. Mine is never totally round. I like to call it rustic :) Remove top layer of parchment paper.  I prefer a bit of an edge on my crust so I folded over the outside by about a half inch. Pick up the parchment and place in crust in the oven on the stone.  Bake for 10 minutes. Remove from oven, add toppings, bake again for 10-12 minutes or until edges start to brown or cheese (if you're using any) starts to melt. The crust is thin, crispy and delicious!

Turkey and Spinach Topping (makes two)
20 oz lean ground turkey
1 can no salt added diced tomatoes
2 tbsp stone ground mustard
1 tbsp no sugar added pickle relish
1 tbsp garlic powder
1/4 cup dehydrated onion (if you don't have these on hand, dice a small white onion and brown with the ground turkey)
1 cup frozen chopped spinach, thawed
1/2 tsp red pepper flakes (more or less based on heat level desire)

In a large skillet, brown the ground turkey and drain any grease.  Add remaining ingredients excluding cheese and heat slightly.  Add half of the mixture to the top of your warm crust.  Evenly spread cheese over the top. Bake 10-12 minutes or until cheese is melted and crust is starting to brown.

Your left over topping would freeze well or use it to make a second pizza while you devour the first. My family also likes to eat this mixture with fresh baked corn tortilla chips as well!

While I haven't yet tried it, I think this crust would hold up well to having added spices.  Some Italian seasoning would be a lovely addition to give it some more flavor.  It would also hold Parmesan cheese well but would likely require a little additional oil to retain the moisture.  I will most certainly continue to experiment with additions to this crust because I am in LOVE :)

I'd love to hear about your experiences with this recipe!  Use the comments or email me :)

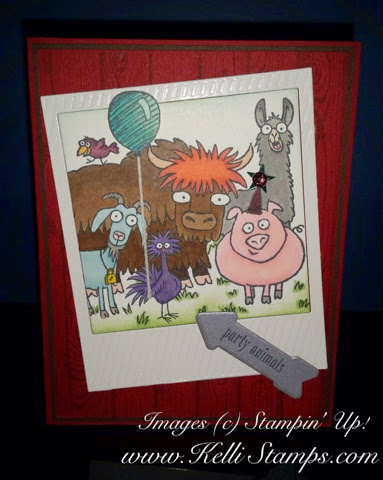
Hey, Party Animal!

Have you heard? It's From The Herd! I know, I know. I'm a goof but I really do like the stamp set. I think it's adorable. I mean, do you have another stamp set that lets you color a blue goat?? Didn't think so.
My Koloring Krew starts on Thursday and this will be one of our projects. We will be working with Stampin' Blendabilities and learning more ways to blend color and shade images using these amazing markers. I'm excited to give my stampers an evening of nothing but coloring time so they can work to perfect their skills and turn out beautiful paper crafts.
Koloring Krew meets the fourth Thursday of each month and will feature a fun coloring method each month. We will certainly do a lot with Blendabilities but we will also explore the use of blender pens, watercolor, and other coloring methods all using Stampin' Up! products. If you want to join us, check out the sign up specials linked on my blog and visit www.meetup.com/KelliStamps4U to register.

Friday, January 16, 2015

It's a Lovely Day

I've been having quite a time playing with my brayers. Nothing too crazy or complicated, just some simple color layering to brighten up an otherwise dreary day.

There are so many ways to use your brayer. So many ways to add texture and layers of color to your cards and scrapbooks. My Lovely Day card, for instance, uses six brayered colors, four different brayered mediums, and two brayer techniques. Your brayer is a great tool to get to know and love. Join one of my Brayer Basics classes to learn to make a your own color layered creations. Head over to www.meetup.com/KelliStamps4U to register.

Sheltering Tree from the Occasions Catalog provided the focal point stamp. The words are from the ever versatile set Endless Birthday Wishes. The Irresistibly Yours designer paper from Sale-A-Bration provides the cool vine background.  It is pre-embossed white on white making it the perfect candidate to use with your brayer. You can get a pack for free with your $50 order. As a matter of fact, that's the only way you can get your hands on this cool paper ;)

Happy Stampin'

Tuesday, January 13, 2015

Perpetual Calendar

Project that solved two issues.  I needed a desk calendar and I also needed a cool stamp club project.  Enter my fabuloso perpetual calendar featuring the new Stampin' Up! Perpetual Birthday Calendar stamp set from the Occasions Mini Catalog!

Never mind the mess on my desk.  It happens.  I'm a creative. There is no creativity in a clean desk :) This fabulous perpetual calendar is designed to fit a 4x6 photo frame.  The one shown is a Tolsby frame from IKEA. We simply used the super cool background stamps from the Perpetual Birthday Calendar to create 4 themed backgrounds per 4" x 6" sheet of cardstock. Simply flip it around to change the month, add the correct calendar page and VOILA! You've got a calendar for all year, every year for the rest of forever!

I have a digital file ready to roll for anyone who wants to create their own 4" x 6" Perpetual Calendar that includes calendar layouts with the 1st starting on each day of the week and having both 30 and 31 days in the month.  Simple instructions are included to create your own calendar project (including cutting instructions) with examples of how to use the Perpetual Birthday Calendar set. This file is available at no charge to all of my current customers! If you've placed a minimum $25 order in the last 30 days, simply email me and ask for it.  Not a customer yet? Visit my shopping site, order your very own Perpetual Birthday Calendar stamp set (or whatever else suits your fancy) and get your very own copy of the calendar file.

Full disclosure, I also used the Project Life Day to Day stamp set on my project.  I really like the font that stamp set offers. I didn't use it for all of  my months and you certainly don't have to either.  Mix it up. Have fun! As long as you've got a great calendar that you don't have to change year after year, you've got beauty and function rolled into one happy package!


Saturday, January 10, 2015

Brayer Basics

Have you played with your brayer lately?  I have.  I LOVE my brayer. I really want you to love your brayer, too.

By popular request, I'm bringing back my Brayer Basics class.  In this informative technique class, you will learn how to use your Speedball rubber brayer to create beautiful graded color backgrounds, textured elements and more.  We will walk through using your brayer step by step, getting you ready to create amazing works of art all your own.

This class comes with a brand new brayer for you to use during class and take home when you’re done.  Already have a brayer?  You’ll find out during this highly anticipated class that having more than one is a very good thing!!

You will receive written, full color instructions to reference after class. You will also have an opportunity to practice your new brayer skills by participating in a post class brayer card swap.

I am offering two different dates - Saturday, March 6 at 9:30am and Monday, March 8 at 7:00pm.  Advanced registration is required for this class.  Reserve your spot today for $30 by visiting the Kelli's Korner Meetup page at www.meetup.com/kellistamps4u or by emailing me directly.

Tuesday, December 23, 2014

Adjusting the size of your one hour slipper socks

Now that you've mastered the art of creating a pair of slipper socks in an hour from my original post, you might want to adjust their sizing to fit the big foots like me or make them more comfortable with folks with wider feet.  If you like to wear socks with your slipper socks, you might want to go with some larger sizing to make them more comfortable.

The original pattern fits an average woman's foot ranging in size from about 7-9ish.  I wear about a 10-1/2 shoe and while the original pattern stretches to fit my foot, it's kinda tight. I can make them fit simply by adding a couple rows, one in the foot and one in the heel. Everything else stays the same.

One Hour Slipper Sock
1 - Start with a Magic Circle. Ch 1 (does not count as a stitch here or throughout the rest of the pattern), hdc 6 times in circle. Tighten and join in first hdc. (If you aren't comfortable working with a magic circle, ch 4, join to form a circle. ch 1, 6 hdc inside circle. Join)
2 - Ch 1. 2 hdc in each stitch around. Join (12 hdc)
3 - Ch 1. (hdc in next 2 st, 2 hdc in next st) around. Join (16 hdc)
4 - Ch 1. (hdc in next 3 st, 2 hdc in next st) around. Join (20 hdc)
5 through 14 - Ch 1. hdc around. Join (20 hdc)
Add or remove rows here to adjust the size of your slipper sock.
For the rest of the rows you want to crochet between stitch posts. The reason for this is comfort. If you crochet with the stitches a seam line is created that's just not all that comfortable to walk on. Trust me. Its part of the reason I whipped up my own pattern.
15 - Ch 1. hdc in next 14 st. Turn. (14 hdc)
16 through 21 - Ch 1. hdc in each st. Turn (14 hdc)
Add or remove rows here to adjust the size of your slipper sock.
Finish as originally instructed.

Now, if you want to make some slipper socks for those with wider feet or someone who prefers a looser slipper sock, I have an adjusted pattern just for them. Same yarn, same hook. This pattern fits a wide size 11 woman's foot or a men's size 9ish. The pink slipper sock in the photo below is made using the larger pattern with no additional rows added.
One Hour Slipper Sock - Larger Size
1 - Start with a Magic Circle. Ch 1 (does not count as a stitch here or throughout the rest of the pattern), hdc 8 times in circle. Tighten and join in first hdc. (If you aren't comfortable working with a magic circle, ch 4, join to form a circle. ch 1, 8 hdc inside circle. Join)
2 - Ch 1. 2 hdc in each stitch around. Join (16 hdc)
3 - Ch 1. (hdc in next 3 st, 2 hdc in next st) around. Join (20 hdc)
4 - Ch 1. (hdc in next 4 st, 2 hdc in next st) around. Join (24 hdc)
5 through 15 - Ch 1. hdc around. Join (24 hdc)
Add or remove rows here to adjust the size of your slipper sock.
For the rest of the rows you want to crochet between stitch posts. The reason for this is comfort. If you crochet with the stitches a seam line is created that's just not all that comfortable to walk on. Trust me. Its part of the reason I whipped up my own pattern.
16 - Ch 1. hdc in next 16 st. Turn. (18 hdc)
17 through 22 - Ch 1. hdc in each st. Turn (18 hdc)
Add or remove rows here to adjust the size of your slipper sock.
Finish as originally instructed.

Enjoy making these quick and easy slipper socks.  If you love them, hate them or have any questions, let me know!  I want to hear from the folks who take the time to try my first ever crochet pattern :)

One Hour Crocheted Slipper Socks

I do more than just stamp. I also do quite a lot of crochet. This Christmas season has been the season of slipper socks. I've made lots and lots of slipper socks! I worked through a lot of patterns and never really found one I liked. Some were uncomfortable. Some were not cozy. I wanted some that covered my whole foot and didn't leave the top of my foot exposed (that part gets cool, too!) So, here's the one I came up with from my little brain. I can make a pair in about an hour (I consider myself an intermediate crocheter with medium/average speed.) 

Since I've gotten so much from the internet world of free patterns I thought I'd give one back. This pattern fits an average woman's foot, say size 7 - 9ish. They stretch so there's a little bit of wiggle room for sizing. I'll address making them larger, smaller and wider in this post. Ready to whip up some slipper socks? Let's go!

This pattern uses two strands of worsted weight yarn held together throughout.
100 yards of 2 WW yarns
Size K/10 6.5mm Crochet Hook
Finishing needle
Optional - buttons, pompoms, or other embellishments

Start with a Magic Circle. Ch 1 (does not count as a stitch here or throughout the rest of the pattern), hdc 6 times in circle. Tighten and join in first hdc.
(If you aren't comfortable working with a magic circle, ch 4, join to form a circle. ch 1, 6 hdc inside circle. Join)

2 - Ch 1. 2 hdc in each stitch around. Join (12 hdc)
3 - Ch 1. (hdc in next 2 st, 2 hdc in next st) around. Join (16 hdc)
4 - Ch 1. (hdc in next 3 st, 2 hdc in next st) around. Join (20 hdc)

5 through 14 - Ch 1. hdc around. Join (20 hdc)
For the rest of the rows you want to crochet between stitch posts. The reason for this is comfort. If you crochet with the stitches a seam line is created that's just not all that comfortable to walk on. Trust me. Its part of the reason I whipped up my own pattern.

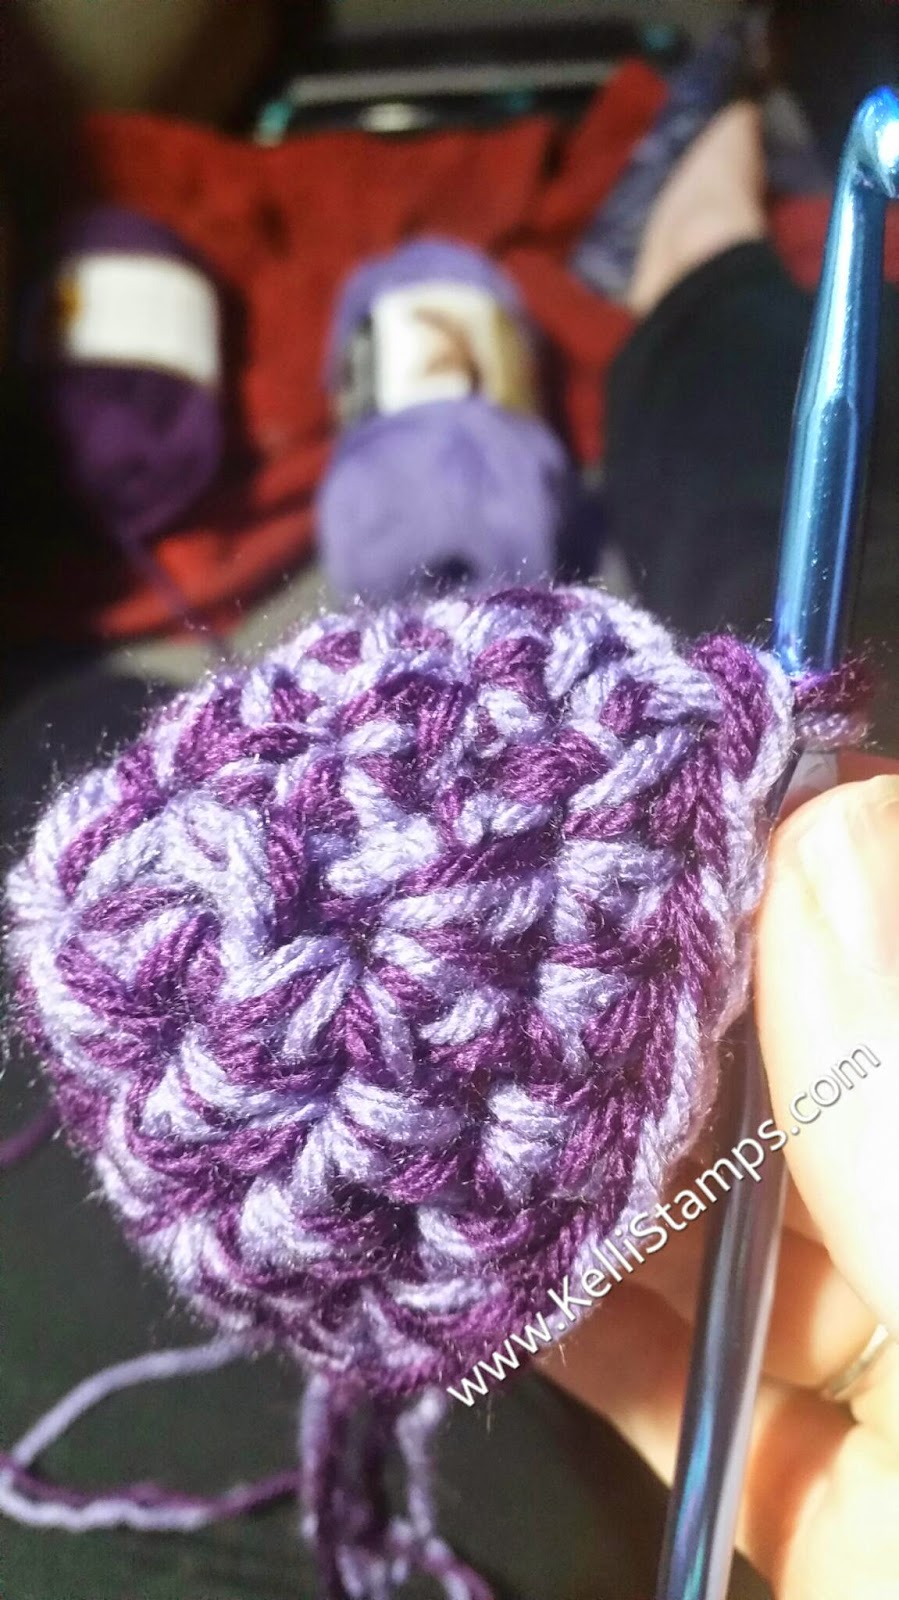
This is what your half slipper sock should look like after 14 rows

15 - Ch 1. hdc in next 14 st. Turn. (14 hdc)
16 through 21 - Ch 1. hdc in each st. Turn (14 hdc)
The base for your slipper sock is complete.

The edging is optional but I think it makes the project look more finished. You should do it. Really. Don't skip this part. It looks nice.

Edging - Ch 1. Turn 90 degrees. You will be stitching  into the side of the 7 rows, across the 6 stitches showing from the rounds then across the other side. Make 1 sc in each space or stitch across. 

Doesn't that look so much better than those crummy unfinished edges? It took you, what, 30 seconds? Told ya so :)

Go ahead and finish off your work but leave a long tail to stitch up the back of your skipper sock. Using a finishing needle, whip stitch the heel together. Don't stitch it too tight but dont stitch it too loose either.

See, nice and stitched up.

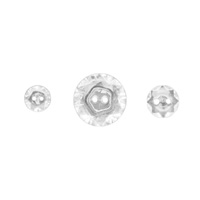
Now you can add a little embellishment to the foot if you so desire. Now, did you really think I'd get through this post without a little Stampin' Up!? Heck NO! The buttons I used are just the right amount of bling. They are Designed Vintage Faceted Buttons. They come in a box of 24 in 3 different sizes. Pretty, right?

If you make some slipper socks I would love to see them! If you find an error in the pattern or have questions on any of my instructions post them here ir email me at the link  on my page. Enjoy your new duds!

Thursday, December 18, 2014

It's time to Celebrate Today

What says CELEBRATE more than a bouquet of beautiful balloons?  Absosmurfly nothing, I say!  Another sneak peek of the Occasions Mini catalog featuring the new Celebrate Today stamp set.  Lots of options to play with beautiful balloons and a wonderful set of matching Big Shot Framelits. You'll be able to bundle them both and save 15%. Everyone loves a deal :)

Be sure to Celebrate Today and stamp stamp stamp!

Sunday, December 14, 2014

Little things make a difference

Sometimes it's the little things that make all the difference.  I'm playing with a gorgeous stamp set from the upcoming Sale-A-Bration catalog today called Lotus Blossom.  I'm in L.O.V.E!  It's a 2-step stamp set that adds layers of petals in multiple colors to create these brilliant flowers.  My flowers are a combination of Island Indigo and Pool Party (right) with Elegant Eggplant and Wisteria Wonder (left) with the stems in Garden Green and Wild Wasabi.  Gorgeous.  Love it!

What I really love, however, is a little step up I used to create this card.  I employed some Stampin' Spritzers to add just a little touch of color to the background.  It's not a stark contrast but it makes a definite impact to the design.  Check it out.

The image on the left has no spritz.  It's just a plain ol' white background.  The image on the right has been spritzed with Wild Wasabi on the bottom and some Pool Party on the top.  It's not a lot but that little bit really does make a nice difference to the background, right?

The process is simple.  Add a few drops of reinker to your Stampin' Spritzer. I tend to use 4-6 drops depending on how deep I want the coloring. Add rubbing alcohol to your spritzer. I usually go about half way.  Give it a little shake and spritz spritz spritz.  A nice little extra to add to your cards.

Grab your Stampin' Spritzers and give them some love?  Don't have any?  I can hook you up!  Sale-A-Bration starts January 6.  With a $50 purchase, you can get the beautiful Lotus Blossom stamp set for FREE!!  Click the SHOP NOW link above to start shopping!

Happy Stampin'!

Thursday, December 11, 2014

January Classes

With the launch of the new Occasions Mini Catalog and Sale-A-Bration, we're celebrating in Kelli's Korner with some fun and fabulous classes.  Check out our Meetup Group to register for any of these great classes.  Be sure to become a member of the group to get regular updates on our classes and events!


Stampin' Bingo - Win new merchandise from the Occasions Mini and a chance to win $50+ in the grand prize coverall!!  Register here --> http://www.meetup.com/kellistamps4u/events/219192871/

Birthday Surprise - It's time to get your birthday cards ready for 2015 with this fun One Sheet Wonder class. Choose from two dates.
Saturday session --> http://www.meetup.com/kellistamps4u/events/219193129/
Monday session --> http://www.meetup.com/kellistamps4u/events/219193238/


It's a sneak peek...From the Herd

Have I really not posted anything since August??  Holy cow. How life gets in the way of the little extras.  Life at our house got a little out of control for a while.  I seem to have said that quite a bit over the last couple years, huh?  That's what I love about crafting, though. It's always there when the dust settles. If I can get my act together, I'd have months worth of blog posts...one day at a time :)

I just got my Occasions Mini Catalog pre-order this week.  This is quite possibly one of my favorite catalogs that Stampin' Up! has ever put out.  The stamp sets are amazing. the accessories are awesome.  I love the colors.  It's just GOOD.  It put me in a super mood to start to play with all of my new goodies...and gave me an awesome creative outlet.

I got out my Blendabilities to play with this new Herd of beasts.There might just be some new Blendabilities colors to play with starting in January.  I won't confirm or deny anything but do you see anything you've not seen before??  You should :)  The new From the Herd stamp set spoke to me as soon as I saw it. So, I stamped, I colored and now, I have a lovely belated card since that's the way I tend to roll these days.

I'm gonna try to do this a little more frequently.  I might even post some of the other non-stamping projects I've been working on.  Maybe. We'll see :)

Friday, August 22, 2014

She Believed She Could

It's been a busy couple of weeks here.  With school starting again for everyone and my big child moving back to college, things have gotten a little hectic.  I've been stamping, just not sharing.  If I could get someone to work on just taking photos and blogging for me, I'd be in a great place!  Any takers??

I'm more than just a stamper.  I do a lot of crocheting also.  I've taken on a personal project this year to create hats for the local shelters.  I'm also making chemo caps to donate to women who need them.  I have a couple caps ready to mail out to someone special and couldn't let the package leave without including a special card.

I've always loved this saying and I thought it very appropriate. To me it speaks to the inner strength of a woman, be she a rising business executive or fighting the fight of her life. It motivates me. I really love it :)

Besides the meaning, I think my favorite element on this card is the butterfly.The butterfly was stamped using our Classic ink in Mambo Melon but the coloring was done using the Coastal Cabana Stampin' Blendabilities.  Did you know, our Classic Ink Pads are water based making them "smudge free" when working with your Blendabilities? Cool, I know!  Cool factor #2 is the pearl center of the butterfly is our Pearl Basic Jewels that have been colored with the Mambo Melon Stampin Blendabilities. We can make everything match!

The background is sponged on Whisper White.  I almost got out my brayer to do this one but thought better of it. Some brayering is coming soon, tho. I miss my good ol rubber roller.  That's all for now, folks.  Until next time, Happy Stampin!

Product List
115656s
Melon Mambo Classic Stampin' Pad*
[115656]
$5.95