
I do more than just stamp. I also do quite a lot of crochet. This Christmas season has been the season of slipper socks. I've made lots and lots of slipper socks! I worked through a lot of patterns and never really found one I liked. Some were uncomfortable. Some were not cozy. I wanted some that covered my whole foot and didn't leave the top of my foot exposed (that part gets cool, too!) So, here's the one I came up with from my little brain. I can make a pair in about an hour (I consider myself an intermediate crocheter with medium/average speed.)
Since I've gotten so much from the internet world of free patterns I thought I'd give one back. This pattern fits an average woman's foot, say size 7 - 9ish. They stretch so there's a little bit of wiggle room for sizing. I'll address making them larger, smaller and wider in this post. Ready to whip up some slipper socks? Let's go!
This pattern uses two strands of worsted weight yarn held together throughout.
100 yards of 2 WW yarns
Size K/10 6.5mm Crochet Hook
Finishing needle
Optional - buttons, pompoms, or other embellishments
Start with a Magic Circle. Ch 1 (does not count as a stitch here or throughout the rest of the pattern), hdc 6 times in circle. Tighten and join in first hdc.
(If you aren't comfortable working with a magic circle, ch 4, join to form a circle. ch 1, 6 hdc inside circle. Join)

2 - Ch 1. 2 hdc in each stitch around. Join (12 hdc)
3 - Ch 1. (hdc in next 2 st, 2 hdc in next st) around. Join (16 hdc)
4 - Ch 1. (hdc in next 3 st, 2 hdc in next st) around. Join (20 hdc)
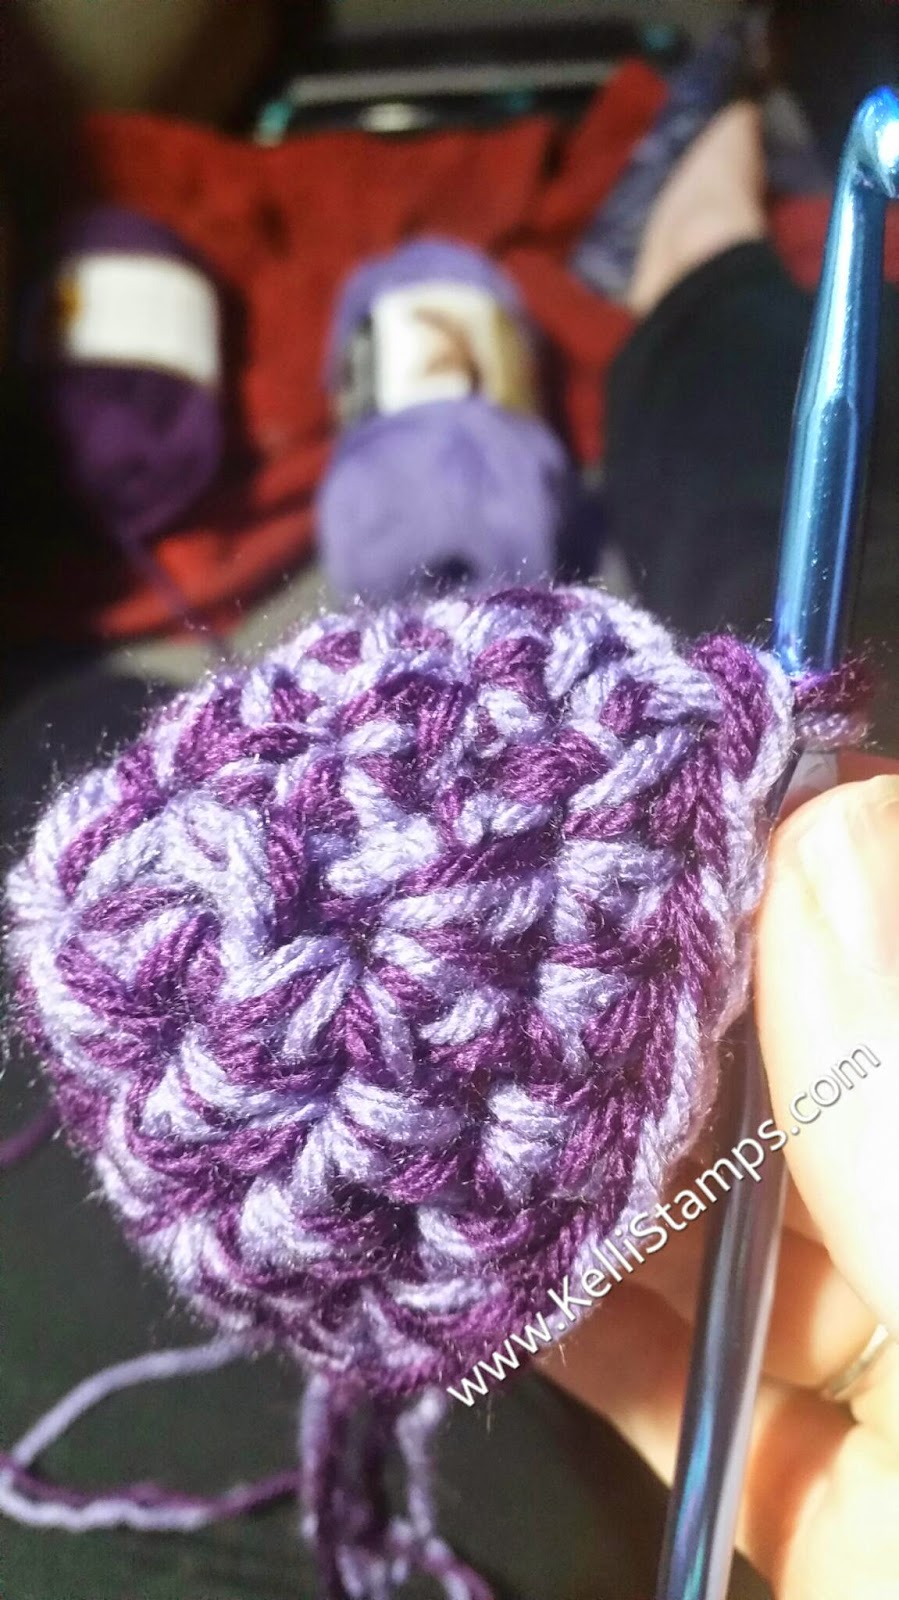
5 through 14 - Ch 1. hdc around. Join (20 hdc)
For the rest of the rows you want to crochet between stitch posts. The reason for this is comfort. If you crochet with the stitches a seam line is created that's just not all that comfortable to walk on. Trust me. Its part of the reason I whipped up my own pattern.

This is what your half slipper sock should look like after 14 rows

15 - Ch 1. hdc in next 14 st. Turn. (14 hdc)
16 through 21 - Ch 1. hdc in each st. Turn (14 hdc)
The base for your slipper sock is complete.

The edging is optional but I think it makes the project look more finished. You should do it. Really. Don't skip this part. It looks nice.
Edging - Ch 1. Turn 90 degrees. You will be stitching into the side of the 7 rows, across the 6 stitches showing from the rounds then across the other side. Make 1 sc in each space or stitch across.

Doesn't that look so much better than those crummy unfinished edges? It took you, what, 30 seconds? Told ya so :)

Go ahead and finish off your work but leave a long tail to stitch up the back of your skipper sock. Using a finishing needle, whip stitch the heel together. Don't stitch it too tight but dont stitch it too loose either.

See, nice and stitched up.

Now you can add a little embellishment to the foot if you so desire. Now, did you really think I'd get through this post without a little Stampin' Up!? Heck NO! The buttons I used are just the right amount of bling. They are Designed Vintage Faceted Buttons. They come in a box of 24 in 3 different sizes. Pretty, right?


If you make some slipper socks I would love to see them! If you find an error in the pattern or have questions on any of my instructions post them here ir email me at the link on my page. Enjoy your new duds!
Hello Kelli1
ReplyDeleteI'm having some trouble with the One Hour Slipper. Where is the join seam supposed to be? I couldn't tell from your photos if it's vertical, like mined ended up, or if it's diagonal. I'm a newbie to crochet so maybe I
am doing the pattern incorrectly. With the seam straight up vertically, I end up with it sort of sideways after I add on the side parts (14 hdc). TIA for your help.
Hey Cathy. It sounds like you're right on track. The back seam should be vertical so if that's what you've got, you're doing it right :)
ReplyDelete